
Despite its relative unpopularity in the States, especially with non-vegan folk, buckwheat has been a dietary staple in my native Russia for hundreds, if not thousands, of years. It is rumored to have come to Russia from the Greeks around the seventh century, and that’s how its name came about – grechka – meaning of Greek.
It stuck around because of the ease and speed of growing it, and the fact that it is an excellent soil conditioner for rotating crops, and it has a remarkable ability to keep away weeds and resist pests (source). Because of this ability, it has not been subjected to any significant hybridization or fertilizer treatments (it thrives on soil too poor for other crops).
In Russian folklore, buckwheat was referred to as ‘mother of grains’ with rye being ‘the father’. Technically, buckwheat is a seed, and not a grain (because it doesn’t grow on grass), from the same family as rhubarb and sorrel. But that doesn’t prevent it from being used the same way as any grain – it can be made into cereal, cooked as a porridge, ground into flour, sprouted or fermented.
On the other hand, buckwheat is by far superior to any grains, it is a source of a complete protein consisting of nine amino acids, two of which, lysine and arginine (source), are considered essential but we can only get them through food because our bodies cannot produce them.
Buckwheat is high in resistant starch (RS). RS is a part of starch that escapes enzymatic hydrolysis (digestion, or breaking down) in the small intestine, and passes all the way to the large intestine (colon) where it becomes a source of fuel for beneficial bacteria. It contributes to good maintenance of colon health and has beneficial effects on glucose metabolism (source).
This article by Dr. Axe is a good resource about health benefits and properties of buckwheat. Sprouting buckwheat helps degrade its phytic acid, which is responsible for long term storage of phosphorus. Phosphorus is a building block of every living cell, and is an element that can store a huge amount of energy in its chemical bonds.
Phytic acid affects absorption of iron, zinc and some calcium; it’s even referred to as anti-nutrient. When phytic acid is neutralized in sprouted buckwheat, its mineral content gets drastically increased making the following readily available for absorption – calcium, phosphorus, magnesium, potassium, sodium, zinc, copper and manganese, as well as powerful flavonoid called rutin (source).
GELATINIZATION OF SOAKING OR SPROUTING BUCKWHEAT
You will notice the pinkish gelatinous (some describe it as ‘slimy’) mucilage forming during the sprouting or soaking process. Most starch granules consist of two molecules – amylose and amylopectin. With addition of water (and also heat) those granules undergo a process of gelatinization, where amylose binds with water and forms a gel. Some grains and legumes respond by swelling inside (like spelt, einkorn, rye, oat, barley, etc) but buckwheat in particular has a higher water binding capacity and lower ability to swell, which is compensated by leaching the starch, which forms a gel outside of the seed kernel (source).
If you eat buckwheat regularly but have hard time keeping the groats from sticking together during cooking, sprouted and dried buckwheat might just be the solution – it makes fluffy porridge with groats that fall apart. I make this sprouted buckwheat porridge regularly and it always comes out light, without sticking. Or if I want a plain side dish, I use sprouted buckwheat in this recipe, which I also go to when I don’t have sprouted stuff on hand.
HOW TO SPROUT BUCKWHEAT GROATS
Ingredients
1 cup of raw buckwheat groats
Water
Instructions
Place buckwheat groats into a bowl and rinse, changing water several times, until the water becomes relatively clear (I find that it’s easier than rinsing in a sieve under running water).

Transfer rinsed buckwheat groats into a quart mason jar, and fill the jar with filtered water. Cover with a sprouting lid like this, and leave at room temperature for 6-8 hours.

At the end of that time, drain the water through the lid and rinse a couple of times (filling the jar with water and draining). Buckwheat releases pinkish mucilage during soaking.
Tip the jar onto the side, making sure that at least half the lid is not covered by buckwheat. Leave at room temperature for 6-8 hours. At the end of that time, you should see the tiny sprouts appearing. If there are no sprouts, drain/rinse/tip on the side, and leave again for 6-8 more hours. If you don’t see sprouts by the end of that time, your buckwheat groats might not be able to sprout because of the way they were pre-treated (steamed or heat dried).

Once again, rinse well to get rid of the mucilage. You can use sprouted buckwheat now to add to salads, smoothies or breakfast bowls. Or you can proceed with drying them:
Place groats on a jelly roll pan lined with parchment paper (or a dehydrator tray). Dry at the lowest temperature of your oven for 1-2 hours, or according to manufacturer’s instructions of your dehydrator.

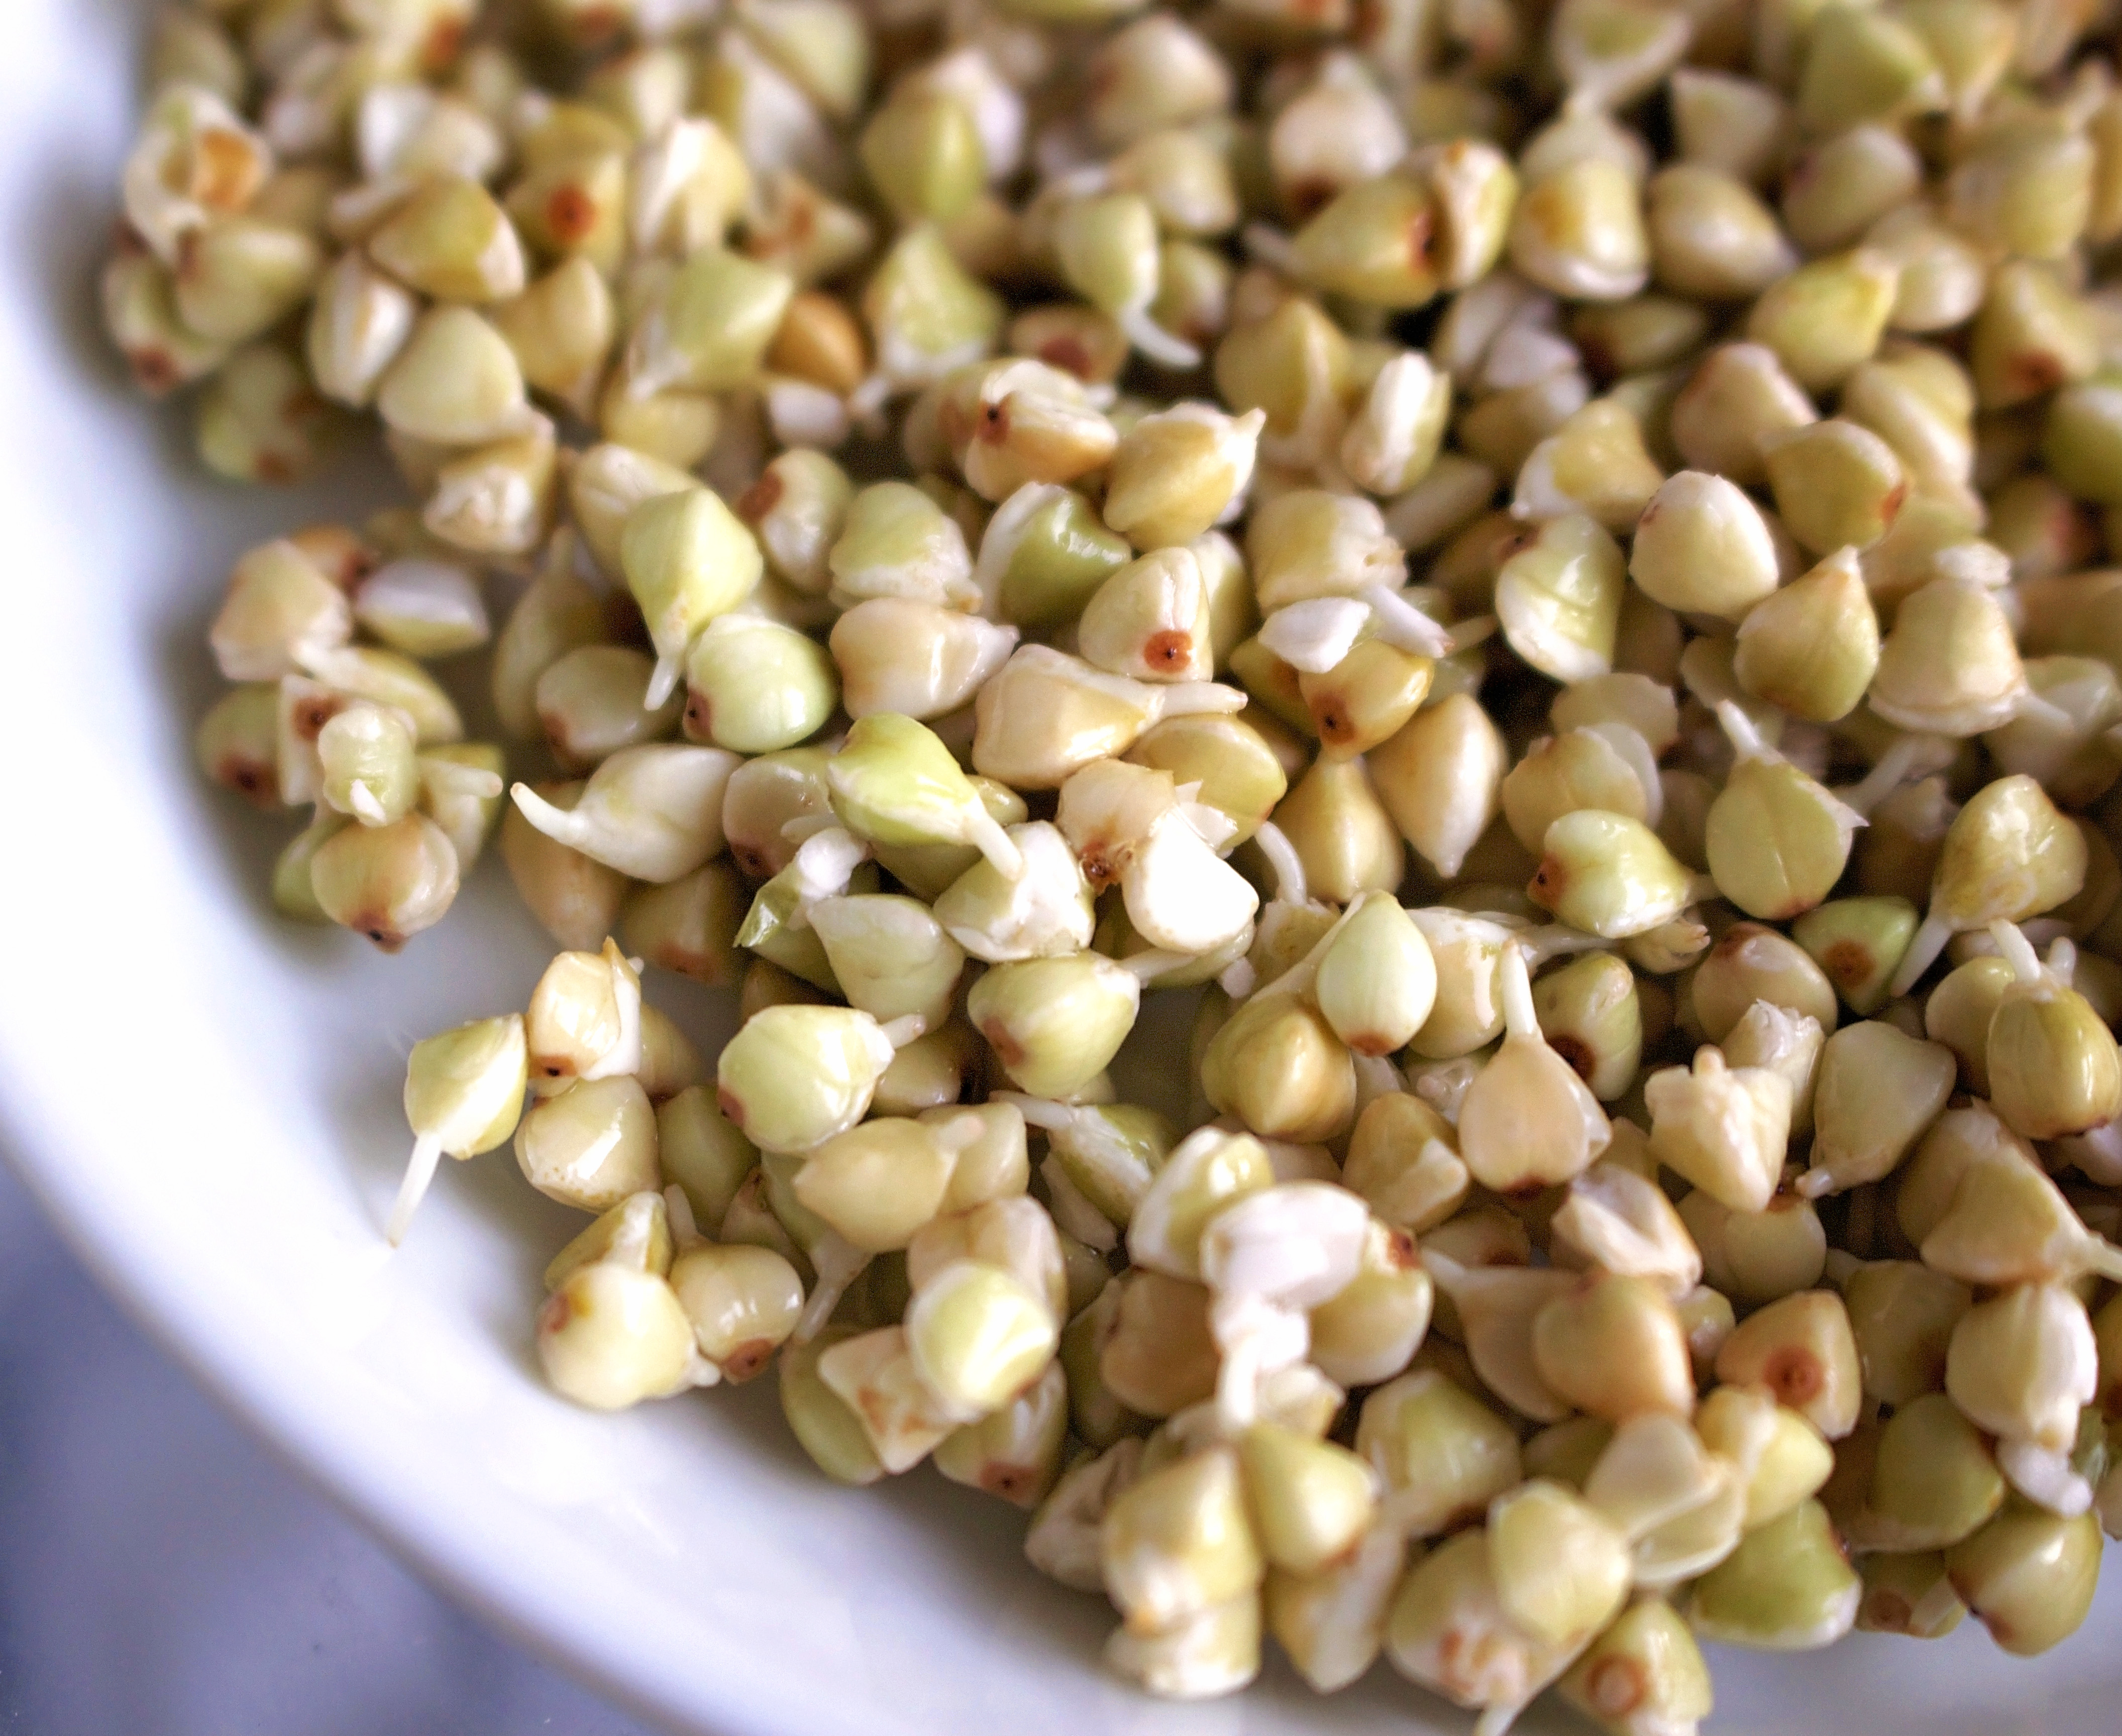
Done! Here is what the final result looks like:


How to Sprout Buckwheat
Ingredients
- 1 cup of raw buckwheat groats
- Water
Instructions
- Place buckwheat groats into a bowl and rinse, changing water several times, until the water becomes relatively clear (I find that it's easier than rinsing in a sieve under running water).
- Transfer rinsed buckwheat groats into a quart mason jar, and fill the jar with filtered water. Cover with a sprouting lid like this, and leave at room temperature for 6-8 hours.
- At the end of that time, drain the water through the lid and rinse a couple of times (filling the jar with water and draining). Buckwheat releases pinkish slimy mucilage during soaking.
- Tip the jar onto the side, making sure that at least half the lid is not covered by buckwheat. Leave at room temperature for 6-8 hours. At the end of that time, you should see the tiny sprouts appearing. If there are no sprouts, drain/rinse/tip on the side and leave again for 6-8 more hours. If you don't see sprouts by the end of that time, your buckwheat groats might not be able to sprout because of the way they were pre-treated (steamed or heat dried).
- Once again, rinse well to get rid of the mucilage. You can use sprouted buckwheat now to add to salads, smoothies or breakfast bowls. Or you can proceed with drying them:
- Place groats on a jelly roll pan lined with parchment paper (or a dehydrator tray). Dry at the lowest temperature of your oven for 1-2 hours, or according to manufacturer's instructions of your dehydrator.


4 comments
There are some very interesting articles and recipes on this website and I would really like to receive new posts.
thank you
No one ever explained how to handle buckwheat, this way. I kept failing because of wrong information.
Thank you.
Does sprouting Buckwheat kill the bacteria?