
Ever since I was a little tyke, Russian rye cakes (called korzhiki) were a part of the world I remember. Most often a korzhik was a meal of its own, with a glass of kefir or ryazhenka, for breakfast, lunch or poldnik (4pm snack). But sometimes, we would spread it with homemade jam, and call it dessert.
Either way you look at it, Russian rye cakes are made with 100% whole grain flour, nutrient rich and very filling. I could eat one for breakfast topped with homemade cream cheese, and not think of food until late afternoon.
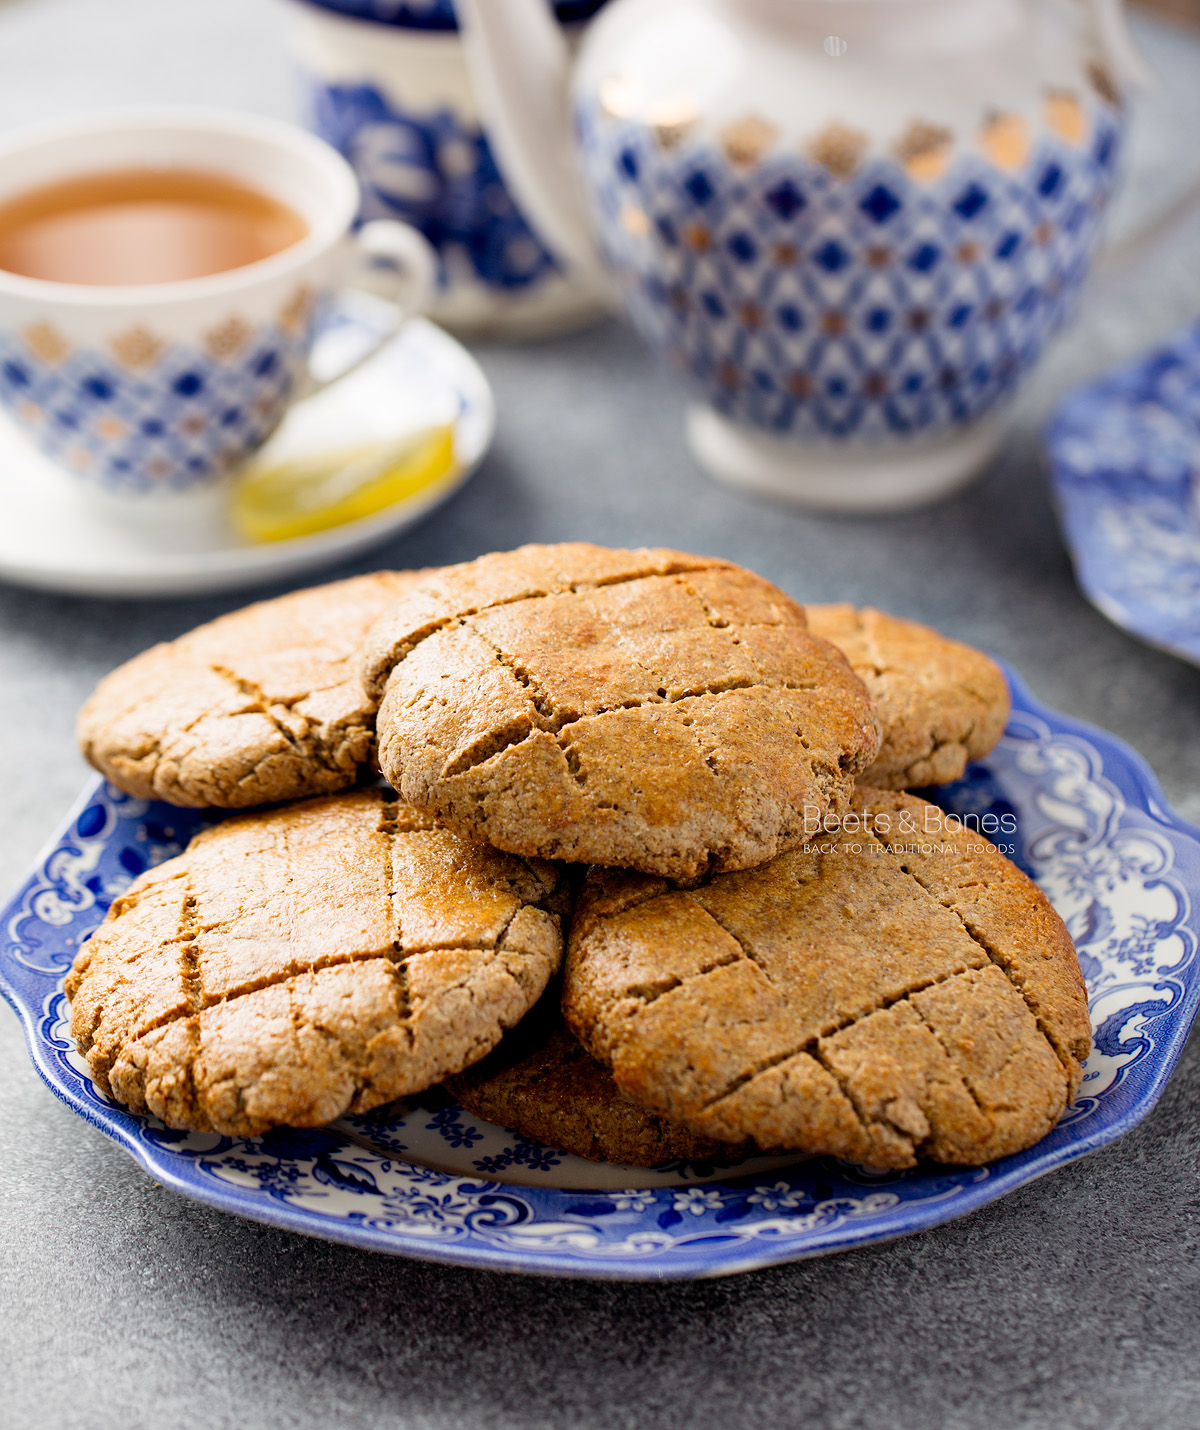
Russian rye cakes are slightly reminiscent of scones, but more dense, less sweet and a bit chewy. They taste fairly plain but delicious nonetheless, and can be flavored with cinnamon, vanilla or hazelnuts.
In the standard Russian GOST recipe, they used a yeasted sponge, and not sourdough. The reason to include rye fermented with yeast, either bakers or wild, is that acidity helps to condition the rye dough. I came across this recipe that uses discarded starter, and thought it was a great idea to use up my discard stash.
HEALTH BENEFITS OF RYE
Rye contains a lot of phosphorus, magnesium, and vitamin B1. It’s remarkable because of the ratio of magnesium to calcium, which is 4:1. Magnesium is important because it is essential for calcium absorption but most people don’t get nearly enough. Calcium, on the other hand, is consumed in excess but when it’s not able to be properly absorbed by our bodies – it gets deposited along the joints causing arthritis, within arteries leading to atherosclerosis, etc.
Heat treatment, just basic oven baking, reduces the phytic acid content in rye to 15% of the original amount (source), a much more dramatic reduction that in any other grains. Phytic acid binds to important minerals making them unavailable for human digestion. So if overconsumption of phytic acid is a concern to you – getting familiar with rye should definitely be on your list.
HOW TO MAKE RUSSIAN RYE CAKES
Ingredients
3.5 cups (400g) whole grain rye flour (I mill my own rye berries)
1/4 cup (50g) sugar
2 teaspoons baking powder
1/2 teaspoon salt
8 tablespoons (113g) melted butter
1 cup (about 200g) rye starter, fresh or discarded (how to make rye starter)
1/4 cup water
2 eggs (1 large for the dough, 1 small for brushing the top)
1 tablespoon sugar for the tops
Optional additions to the dough:
1 tablespoon ground cinnamon
1/2 teaspoon ginger powder
1/2 cup hazelnut flour (you would need 3 cups rye flour in this case)
Instructions
Preheat oven to 350ºF (180ºF).
In a large bowl, whisk 3.5 cups whole grain rye flour with 1/4 cup sugar, 2 teaspoons baking powder and 1/2 teaspoon salt.
Add 8 tablespoons melted butter, 1 cup rye starter, 1/4 cup water and 1 large egg.

Mix everything, at first with a spoon, then your hand until dough comes together (If you have a mixer with a dough hook, it’s easier to mix). The dough will be sticky. To manage the stickiness, generously sprinkle work surface with rye flour and transfer the dough onto it. Sprinkle more flour on top and knead some more.
Separate the dough into 8 pieces, form into balls, and flatten them with your hand to about the size of your palm.
Score the cakes with a sharp knife. Transfer to parchment lined cookie sheet.
Whisk 1 small egg with 1 tablespoon of sugar, and brush the tops of the rye cakes.

Bake for 20-25 minutes, until the top start to brown slightly. Less baking time will produce softer cakes, more time – crunchier.

Russian 100% Whole Grain Rye Cakes {Korzhiki}
Ingredients
- 3.5 cups 400g whole grain rye flour (I mill my own rye berries)
- 1/4 cup 50g sugar
- 2 teaspoons baking powder
- 1/2 teaspoon salt
- 8 tablespoons 113g melted butter
- 1 cup about 200g rye starter, fresh or discarded (how to make rye starter)
- 1/4 cup water
- 2 eggs 1 large for the dough, 1 small for brushing the top
- 1 tablespoon sugar for the tops
- Optional additions to the dough:
- 1 tablespoon ground cinnamon
- 1/2 teaspoon ginger powder
- 1/2 cup hazelnut flour you would need 3 cups rye flour in this case
Instructions
- Preheat oven to 350ºF (180ºF).
- In a large bowl, whisk 3.5 cups whole grain rye flour with 1/4 cup sugar, 2 teaspoons baking powder and 1/2 teaspoon salt.
- Add 8 tablespoons melted butter, 1 cup rye starter, 1/4 cup water and 1 large egg.
- Mix everything, at first with a spoon, then your hand until dough comes together (If you have a mixer with a dough hook, it's easier to mix). The dough will be sticky. To manage the stickiness, generously sprinkle work surface with rye flour and transfer the dough onto it. Sprinkle more flour on top and knead some more.
- Separate the dough into 8 pieces, form into balls, and flatten them with your hand to about the size of your palm.
- Score the cakes with a sharp knife. Transfer to parchment lined cookie sheet.
- Whisk 1 small egg with 1 tablespoon of sugar, and brush the tops of the rye cakes.
- Bake for 20-25 minutes, until the top start to brown slightly. Less baking time will produce softer cakes, more time - crunchier.
14 comments
Looks delicious, Valeria. What if you let the dough ferment and make it even more nutritious? I think I am going to try that.
Thanks, Elena! 🙂 I’ve thought of it but never did it, this recipe is kind of scraping last moment when I don’t have anything ready. Let me know how it works if you try it, I bet it should be just fine.
Добрый день, Валерочка! I am here to report the results of the experiment. I mixed everything together and let it stand on the counter for 3 hours and then in the fridge overnight, which I don’t necessarily recommend unless you have time to let the dough come back to room temp. Because in the morning, the dough was very difficult to handle, which I expected to a certain degree. Because of that I could only shape it into small balls (more cookie size). Despite that korzhiki together with some homemade butter provided a delicious breakfast for us this morning. I added cinnamon to the dough, and it was delicious. Next time, I’ll try adding some nut flower.
I meant “flour” not “flower” 🙂
Privetiki! Thanks so much for the update! Good to know! I really like to use hazelnut flour in these cakes
I make rye rolls every now and then and the dough is very sticky so I shape them with wet hands that I constantly dip in water and then it’s super easy to handle 🙂
Thank you. I will keep it in mind. In my case the dough was too difficult to handle because the butter became hard in the fridge, and the dough was too stiff.
Got ya, makes sense 🙂 Have a good night!!
Good morning, Valerochka! A little update. I tried something a little different this time. I mixed starter, flour, butter, and water and let that sit overnight on the counter. In the morning, in a separate bowl, I mixed an egg, sugar, cinnamon, and baking soda. Then mixed everything together and baked. I am munching on a korzhik with my coffee right now 🙂 Delicious! I would definitely use the second method in the future. Thank you for a wonderful recipe.
Spasibochki! I’m going to try it that way too 🙂
ELENA, I know this is years later (but if you happen to see this…) — I want to try your method above – but it seems you switched the baking powder to baking soda??? Or is that a typo??? I really don’t care for the taste of baking powder (even the non-aluminum kind), so I’m hoping the baking soda would work. Thanks!
tried these today and they turned out reasonably well…considering. They were superbly arduous to make because after reading the recipe once I began to follow the written instructions mentioned – AND THERE IS A TYPO IN THESE.
#3 -> the quantity of water is erroneously written as 1.4 cup, whereas it should be 1/4 (i.e. 0.25) cup. I had already put it in by the time I realized it was a typo and much to my frustration had to substantially increase the quantity of rye flour (+1.5cup) afterwards to get it to come together as a dough after much arm muscle utilization (I don’t own a mixer). Used up way too much flour and ended it up with a somewhat dense cake. Still edible but…phew!
Pls do correct the recipe to save others the time and added effort / back and forth. Otherwise, it’s a nice recipe.
Thank you for letting me know! I fixed that, glad it worked out for you 🙂
hello! can I use a starter thats not active anymore? I fed it early in the morning and its evening now…thank you
Thanks for the recipe, Valeria. I’m really happy to find something healthy to feed my toddler. I did the full ferment mentioned in the comments, baked for a little under 25 minutes (I’m always paranoid about things being undercooked) and they came out a bit dry. I had actually cut the recipe in half but accidentally did a 1/4 cup water anyway. Question about scoring–I make bread (a restart of an old pleasure) and stopped scoring because the slits didn’t open during baking. It seemed to me that they offered no benefit for my bread making since in the past when I scored the dough opened and expanded there while baking. I notice that in your photo the slits don’t look opened. Do you really thjnk that the scoring does something?